
Launching a website without proper search engine optimization setup is like opening a storefront in an alley with no signage. You’ve invested in the space, but no one can find it. Most businesses discover this too late, after weeks of zero organic traffic and mounting frustration.
Before your site goes live, you need a systematic website launch checklist SEO approach to ensure search engines can find, crawl, and rank your pages. This checklist covers essential tasks that protect your search visibility from day one. Skip these steps, and you’ll spend months fixing avoidable problems instead of generating qualified leads.

Pre-launch Planning and Foundation Setup
Most website launches fail because teams treat SEO as an afterthought. By the time the site goes live, fixing technical issues requires developer time, budget approvals, and weeks of delay.
Start your SEO planning during the design phase, not the week before launch. Document your current site’s performance if you’re doing a redesign. Record baseline metrics like organic traffic, top-performing pages, and existing search rankings.
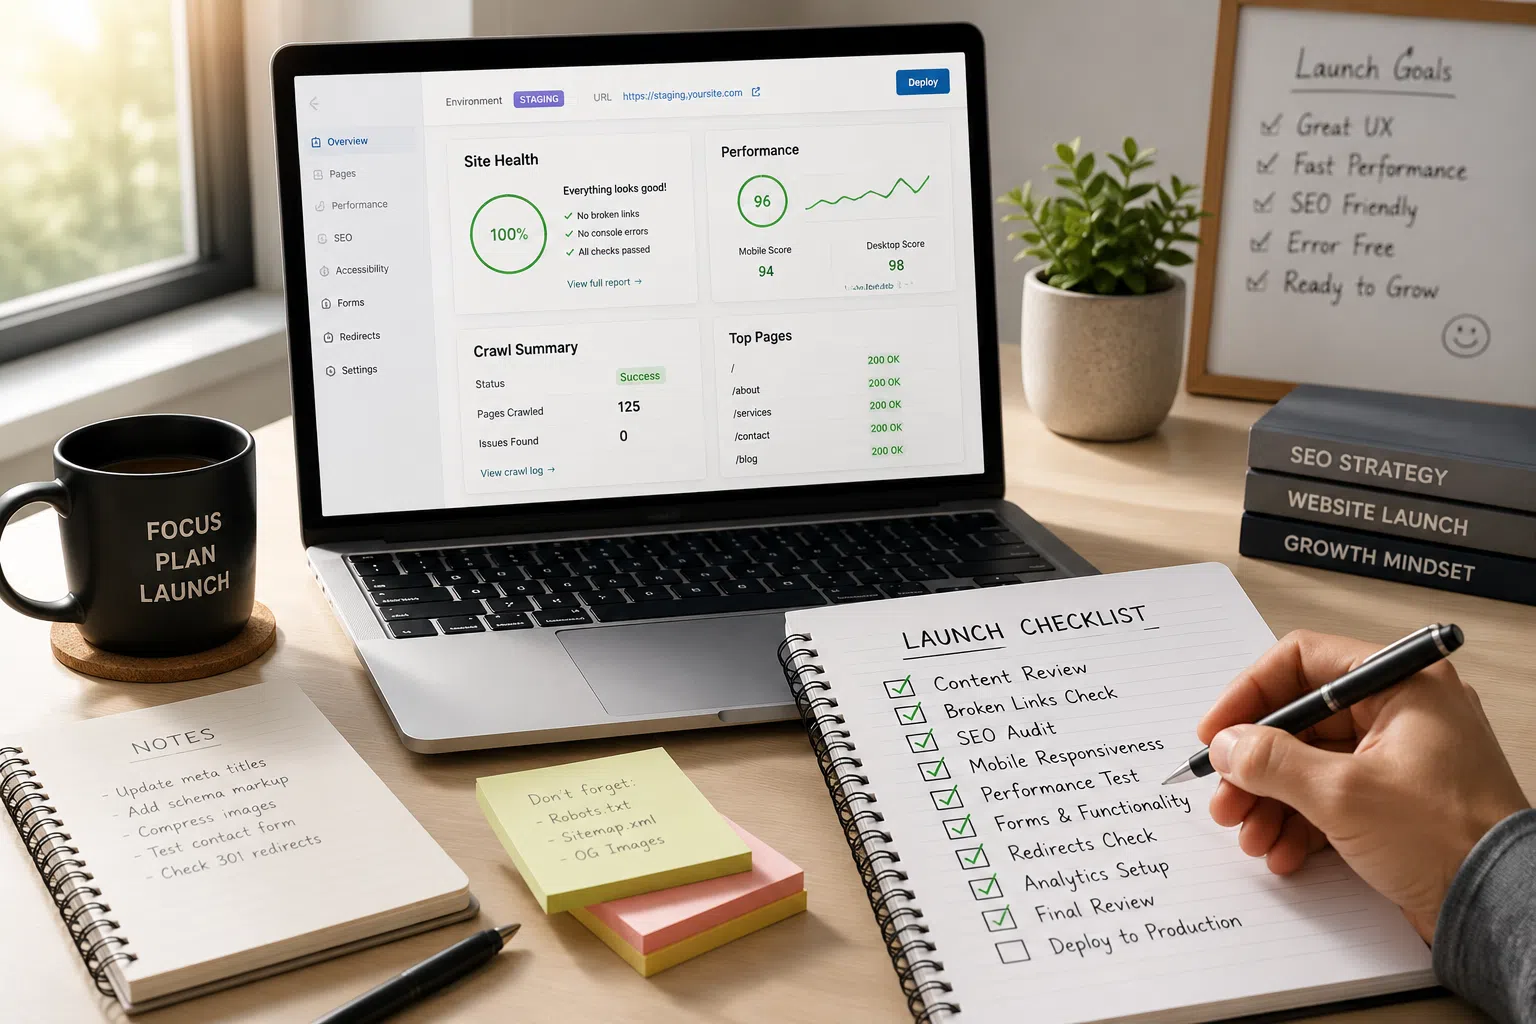
Create a staging environment to test every SEO element before the site goes live. This lets you catch broken links, indexing issues, and configuration errors when they’re easy to fix. The best approach is building SEO into your website from the ground up rather than retrofitting it later.
Define clear goals for your site launch. Are you focused on local visibility? Do you need to preserve rankings from an existing site? Your goals determine which checklist items need the most attention and where to allocate resources.
Technical SEO Audit and Current Site Documentation
If you’re launching a new site to replace an existing one, your first job is documenting what you currently have. This baseline protects you from losing traffic during the transition.
Export a complete list of your current URLs. You’ll use this to map 301 redirects later. Identify which pages drive the most organic traffic using Google Analytics. Note which pages rank for your most valuable search terms in Google Search Console.
Run an SEO audit of your current site using tools like Screaming Frog or Sitebulb. This reveals technical issues you don’t want to carry over, like duplicate content, broken links, or missing meta descriptions. A solid technical SEO foundation ensures these elements work together properly.
Capture performance benchmarks. Record your current page speed scores, mobile usability ratings, and core web vitals.
Analytics and Tracking Configuration
Set up Google Analytics before your site goes live, not after. Launching without analytics means you’re flying blind during the most critical period for identifying problems.
Create a new Google Analytics 4 property if you haven’t already. GA4 is now the standard, and Universal Analytics has been discontinued. Configure your property settings, including your time zone, currency, and data retention preferences.
Install the GA4 tracking code on every page of your staging site. Test it thoroughly to confirm data is flowing correctly. Check that page views, events, and conversions are recording as expected.
Set up conversion tracking for your most important business outcomes. If you want to track form submissions, phone calls, or button clicks, configure these events before launch.
Link your Google Analytics property to Google Search Console. This connection provides richer data on search performance, including which queries drive traffic and how your pages appear in search results.
XML Sitemap Creation and Submission
Your XML sitemap tells search engines which pages exist on your site and how they’re organized. Without it, search engines may miss important pages or take weeks to discover your content.
Generate an XML sitemap that includes every page you want indexed. Most content management systems can automatically generate sitemaps via plugins or built-in features. If you’re on WordPress, plugins like Yoast SEO or RankMath handle this easily.
Review your XML sitemap before submission. Remove any URLs you don’t want indexed, like thank-you pages, staging pages, or duplicate content. Include only canonical URLs.
Submit your XML sitemap to Google Search Console as soon as your staging site is ready. When you launch and remove crawl blocks, Google already knows where to look.
Add your sitemap location to your robots.txt file. This provides a secondary discovery method for search engines. The line should read: `Sitemap: https://yourdomain.com/sitemap.xml`
Robots.txt File Configuration
Your robots.txt file controls which parts of your site search engines can crawl. Misconfigure it and you can accidentally block your entire site from being indexed. This is one of the most common site launch mistakes.
Create a robots.txt file if one doesn’t exist. Place it in your root directory at `yourdomain.com/robots.txt`. You can learn more about proper configuration from Google’s robots.txt documentation.
Block only the directories that contain private information, duplicate content, or pages with no search value. Don’t block your CSS, JavaScript, or image files.
Test your robots.txt file using Google Search Console’s robots.txt Tester tool. This shows you exactly what search engines see and whether you’re accidentally blocking important pages.
301 Redirects Mapping and Implementation
If you’re launching a new site to replace an existing one, 301 redirects are critical. They tell search engines and users where your old pages have moved. Without proper redirects, you lose rankings, traffic, and user trust.
Create a complete redirect map before launch. List every URL from your old site in one column and its corresponding new URL in another. This spreadsheet becomes your implementation guide.
Prioritize redirects for your highest-value pages first. Focus on pages with existing organic traffic, inbound links, or strong search rankings.
Use 301 redirects, not 302s. A 301 signals a permanent move and passes ranking authority to the new URL. A 302 indicates a temporary move and doesn’t transfer authority.
Avoid redirect chains where one URL redirects to another, which redirects to a third. Each hop in the chain dilutes authority and slows page load times.
Test every redirect before launch. Click through your redirect map to verify each old URL lands on the correct new page.
On-page SEO Optimization (Titles, Meta Descriptions, Headers)
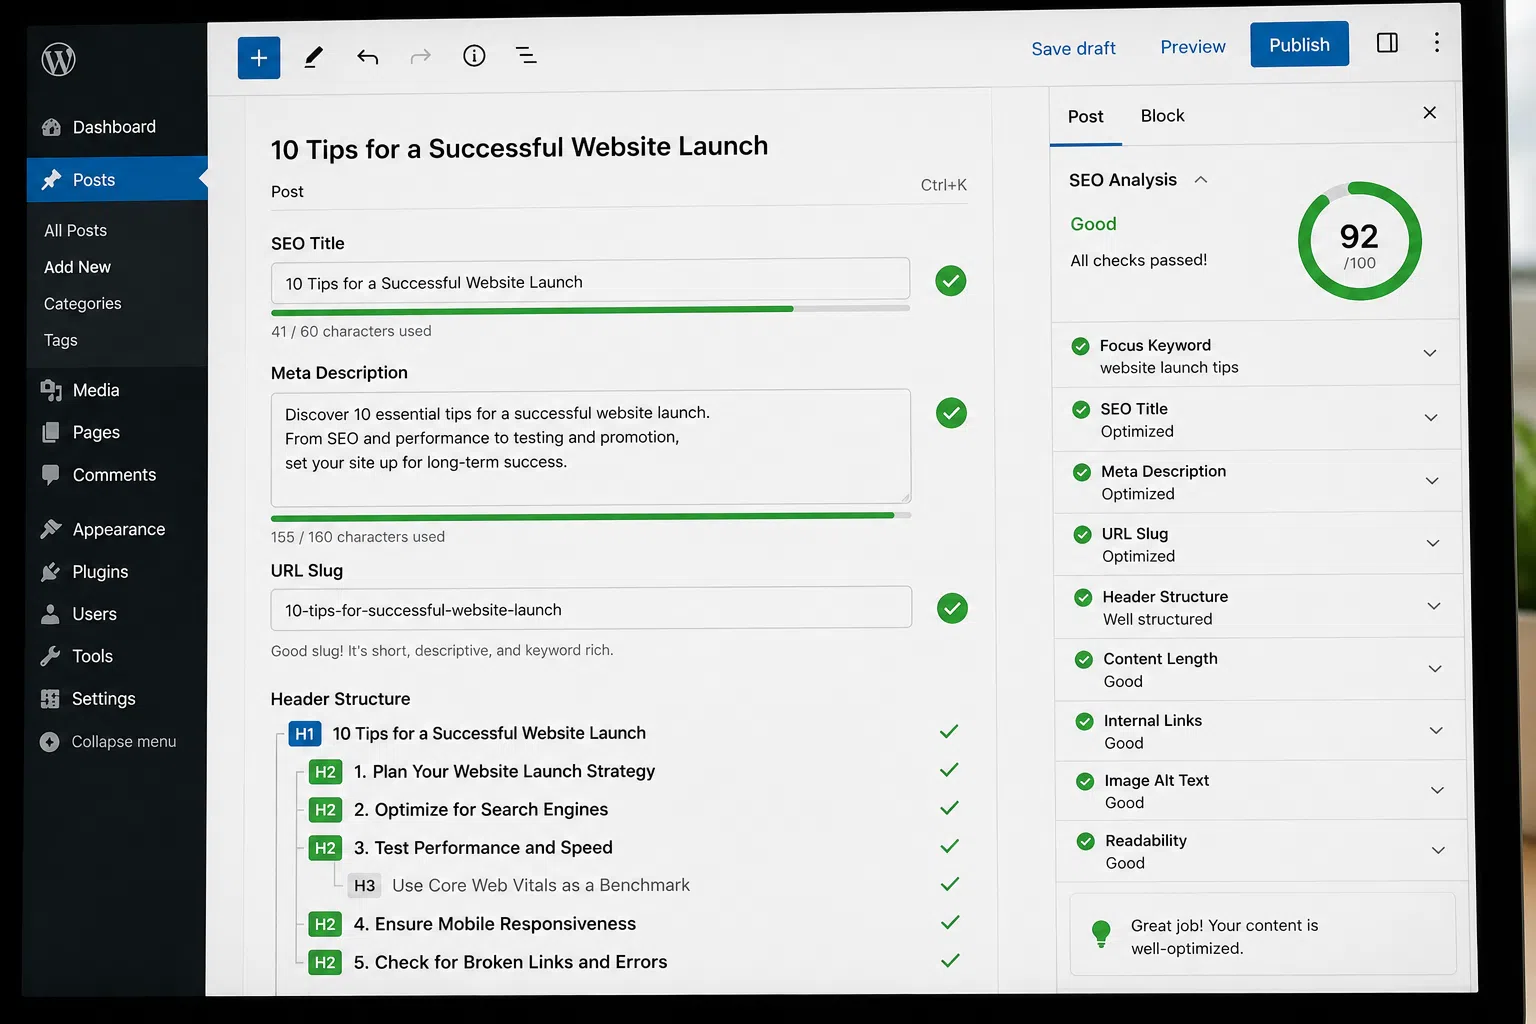
Every page on your site needs optimized title tags, meta descriptions, and header tags before launch. These on-page SEO elements tell search engines what your pages are about and influence whether users click your listings.
Write unique title tags for every page. Each title should describe the page’s content accurately and include relevant search terms. Keep titles under 60 characters so they don’t get cut off in search results.
Avoid generic titles like “Home” or “Services.” Be specific. “Chicago Plumbing Services | 24/7 Emergency Repairs” tells users and search engines exactly what the page offers.
Create compelling meta descriptions for each page. While meta descriptions don’t directly affect rankings, they influence click-through rates from search results. Write descriptions that explain the page’s value and include a reason to click. Keep them under 155 characters.
Structure your content with proper header tags (H1, H2, H3). Every page should have exactly one H1 tag that describes the main topic. Use H2 tags for major sections and H3 tags for subsections.
Include relevant keywords in your headers naturally. Don’t force keywords where they don’t fit.
Mobile Responsiveness and Cross-device Testing
Google uses mobile-first indexing, which means it evaluates your site based on the mobile version, not the desktop version. If your site isn’t mobile-responsive, you’re starting with a significant disadvantage in search visibility.
Test your site on actual mobile devices, not just browser emulators. Real-world testing reveals issues that desktop tools miss. Check your site on both iOS and Android devices with different screen sizes.
Verify that all content is accessible on mobile. Some sites hide content on smaller screens to improve design, but this can hurt your rankings.
Test your forms on mobile. If your site’s goal is lead generation, your forms must work flawlessly on phones and tablets.
Verify that your site loads quickly on mobile networks. Use Google’s Mobile-Friendly Test and PageSpeed Insights to identify mobile-specific performance issues.
Page Speed and Performance Optimization
Website performance directly affects both user experience and search rankings. Slow sites frustrate visitors and rank lower in search results.
Test your site’s speed using Google’s PageSpeed Insights tool, GTmetrix, or WebPageTest. These tools identify specific issues slowing your site down.
Optimize your images before launch. Large, uncompressed images are the most common cause of slow load times. Compress images without sacrificing visible quality. Use modern formats like WebP when possible. Implement lazy loading so that images load only when users scroll to them.
Minimize your CSS and JavaScript files. Remove unnecessary code, combine files where appropriate, and defer loading of non-critical scripts.
Enable browser caching so returning visitors don’t have to download the same resources repeatedly. Set appropriate cache headers for your static assets, such as images, CSS, and JavaScript files.
Use a content delivery network (CDN) if your audience is geographically distributed. CDNs serve your content from servers closer to your users, reducing latency and improving load times.
Broken Links Identification and Fixing
Broken links damage user experience and waste the crawl budget search engines allocate to your site. They also signal poor site maintenance, which can indirectly affect your rankings.
Crawl your staging site to identify all broken links before launch. Use tools like Screaming Frog, Ahrefs, or the W3C Link Checker.
Fix broken internal links by updating the URLs or removing them entirely. If you’re linking to a page that no longer exists, either create a redirect to a relevant replacement page or remove the link.
Check for broken links in your navigation menus, footer, and sidebar. These high-visibility areas affect every page on your site.
Custom 404 Error Page Setup
Users will occasionally land on pages that don’t exist, whether through typos, outdated bookmarks, or broken external links. A custom 404 page turns this frustrating experience into an opportunity to keep users on your site.
Create a 404 page that’s helpful, not generic. Explain what happened in plain language. Avoid technical jargon like “Error 404: Not Found.”
Include navigation options on your 404 page. Add links to your homepage, main service pages, or a search function. Give users clear paths to find what they’re looking for, rather than leaving them at a dead end.
Make your 404 page match your site’s design. A branded 404 page feels more professional and reassures users they’re still on your site.
Configure your server to return a proper 404 status code for missing pages. Some sites mistakenly return a 200 status code (success) for pages that don’t exist.
Schema Markup and Structured Data Implementation
Schema markup helps search engines understand your content better and can earn you enhanced search listings with rich snippets. These enhanced listings often have higher click-through rates than standard results.
Identify which schema types are relevant for your business. Local businesses should implement the LocalBusiness schema. Articles should use the Article schema. Products need a product schema with pricing and availability information. The Schema.org structured data vocabulary provides documentation for all available types.
Implement schema markup using JSON-LD format, which Google recommends. Add the structured data to your page’s HTML, typically in the header or footer.
Include all relevant properties in your schema markup. For the LocalBusiness schema, add your business name, address, phone number, hours, and service area. If you’re targeting specific geographic areas, proper local search optimization requires accurate location data in your schema.
Test your schema markup using Google’s Rich Results Test tool. This shows you whether your markup is valid and what enhanced features you might be eligible for in search results.
Add the Organization schema to your homepage. This helps search engines understand your business identity and can enable your brand to appear in knowledge panels.
Image Optimization (Alt Text, Compression, File Names)
Images make your content more engaging, but they can also slow your site down and represent missed opportunities for search visibility if not properly optimized.
Compress all images before uploading them to your site. Large image files are the primary cause of slow page load times. Use tools like TinyPNG, ImageOptim, or ShortPixel to reduce file sizes without noticeable quality loss.
Use descriptive file names for your images. Instead of “IMG_1234.jpg,” use “chicago-plumber-fixing-sink.jpg.” Descriptive file names give search engines context about your images.
Write meaningful alt text for every image. Alt text serves two purposes: it helps visually impaired users understand your content, and it tells search engines what the image shows.
Choose the right image format. Use JPEG for photographs, PNG for images with transparency, and SVG for logos and icons. WebP offers better compression than JPEG or PNG and is now supported by all major browsers.
Implement lazy loading for images below the fold. This technique loads images only when users scroll near them, improving initial page load times.
Internal Linking Structure and Strategy
Internal linking connects your pages together, helps search engines discover content, and distributes ranking authority throughout your site. A strong internal linking strategy improves both user experience and search visibility.
Plan your site architecture before launch. Organize content into logical categories and subcategories. Your most important pages should be no more than three clicks from your homepage.
Link from high-authority pages to pages you want to rank. Your homepage and other well-established pages have more authority.
Use descriptive anchor text for internal links. Instead of “click here,” use phrases that describe the destination page, like “learn more about technical seo audits.”
Add contextual links within your content. These links are more valuable than navigation links because they’re surrounded by relevant content.
SSL Certificate and HTTPS Implementation
HTTPS is a confirmed ranking factor, and browsers now warn users when they visit sites without SSL certificates. Launching without HTTPS immediately puts you at a disadvantage for both search visibility and user trust.
Install an SSL certificate before launch. Most hosting providers offer free SSL certificates through Let’s Encrypt.
Configure your server to redirect all HTTP traffic to HTTPS. Users who type your domain without “https://” should automatically be redirected to the secure version.
Update all internal links to use HTTPS. Your navigation, footer links, and content links should all point to HTTPS URLs.
Check for mixed content issues before launch. If your HTTPS pages load images, scripts, or stylesheets over HTTP, browsers will show security warnings.
Submit your HTTPS site to Google Search Console as a separate property. Google treats HTTP and HTTPS as different sites.
Canonical Tags and Duplicate Content Prevention
Duplicate content confuses search engines about which version of a page to rank. Canonical tags solve this problem by telling search engines which version is the primary one.
Add canonical tags to every page on your site. Even if you don’t have obvious duplicate content, canonical tags prevent issues caused by URL parameters, tracking codes, or printer-friendly versions of pages.
Point canonical tags to the preferred version of each page. If your site is accessible at both www.yourdomain.com and yourdomain.com, choose one as your canonical version and redirect the other.
Use self-referencing canonical tags. Each page’s canonical tag should typically point to itself.
Check for duplicate content issues before launch. Use tools like Siteliner or Copyscape to identify pages with similar or identical content. Consolidate, differentiate, or canonicalize these pages to avoid splitting your ranking authority.
Favicon and Browser Title Optimization
Small details like favicons and browser titles affect how professional your site appears and how easily users can identify your site among multiple open tabs.
Create a favicon that represents your brand. This small icon appears in browser tabs, bookmarks, and mobile home screens.
Generate favicons in multiple sizes and formats. Modern browsers use different favicon sizes depending on context. Create versions at 16×16, 32×32, 180×180, and 192×192 pixels.
Optimize your browser titles (the text that appears in browser tabs). This is the same as your title tag. Keep it concise so it’s readable even when users have many tabs open.
Test your favicon across different browsers and devices. What looks clear in Chrome might be blurry in Safari.
Legal Pages (Privacy Policy, Terms of Service)
Legal pages aren’t just about compliance. They build trust with users and are increasingly important for search engines evaluating site quality and trustworthiness.
Create a privacy policy before launch. Explain what data you collect, how you use it, and how users can control their information. If you use Google Analytics, cookies, or any tracking tools, disclose this clearly.
Add terms of service if your site involves transactions, user accounts, or user-generated content.
Make your legal pages easy to find. Link to them in your footer on every page.
Final Pre-Launch Review
Before you flip the switch, conduct a final review. This is your last chance to catch issues before they affect real users and search engines.
Work through your pre-launch SEO checklist systematically. Verify that every item has been completed and tested. Don’t skip steps because you’re eager to launch.
Successful launches require coordination across multiple teams and disciplines. If you’re managing your website launch project, ensure everyone understands their responsibilities and deadlines.
Ready to Launch Your Website the Right Way?
Launching a website with proper SEO setup requires expertise, attention to detail, and systematic execution. Miss critical steps, and you’ll spend months recovering lost visibility and traffic.
If you want to ensure your launch goes smoothly and your site is positioned for search success from day one, get in touch with our team. We’ll review your specific situation, identify potential issues, and create a customized plan to protect your search visibility.
FAQs
Q1. How long does it take to complete a pre-launch SEO checklist?
A1. Plan for 2-4 weeks to complete all the tasks properly, depending on your site’s size and complexity. Rushing through these steps defeats the purpose and leads to mistakes that take months to fix.
Q2. Do I need to complete every item on this SEO checklist for a small business website?
A2. Yes, every item matters regardless of site size. Small business sites actually benefit more from proper setup because they have less margin for error and fewer resources to fix problems post-launch.
Q3. Can I add SEO elements after my site launches instead of before?
A3. You can, but you’ll lose critical early visibility and data. Search engines begin evaluating your site immediately upon launch, and first impressions matter for rankings.
Q4. What happens if I skip the 301 redirect mapping?
A4. You’ll lose existing rankings, traffic, and backlink value from your old site. Users and search engines hitting dead links will abandon your site, and recovering lost rankings takes months.
Q5. Is mobile responsiveness really that important for SEO?
A5. Google uses mobile-first indexing exclusively, meaning your mobile site determines your rankings for all devices. A site that doesn’t work on mobile won’t rank well anywhere.
Q6. Should I hire an SEO professional for my website launch?
A6. If you lack technical search engine optimization experience or your business depends heavily on organic traffic, professional guidance prevents costly mistakes. Vineet Kukreti offers launch-focused SEO services that ensure your site starts with a solid foundation.
Vineet Kukreti is an experienced SEO and project management expert with over 10 years of success helping small businesses grow. He has led SEO campaigns that improved Google rankings, increased website traffic, and strengthened local visibility. As a project manager, Vineet brings structure and efficiency to digital operations, ensuring smooth execution and measurable results. His combined expertise in SEO and business operations makes him a trusted partner for growth-focused businesses.